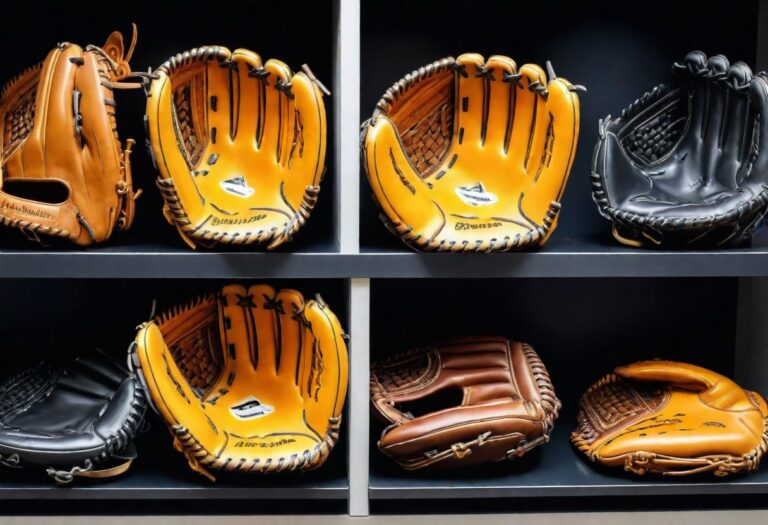
How to Break in a Baseball Glove in the Oven?
Breaking in a new baseball glove can be a real pain. You’re excited to play, but your stiff, new glove is holding you back. It’s like trying to catch with a board!
You might have heard about using an oven to speed up the process, but does it really work? And more importantly, is it safe for your glove?
In this article, we’re going to show you how to break in your baseball glove fast by using the oven method, making it game-ready in no time.
We’ll guide you through each step, ensuring you don’t damage your glove while making it as soft and flexible as your old favorite.
Preparing Your Baseball Glove for the Oven Method
Ensuring Proper Glove Cleanliness
Before attempting the oven method to break in your baseball glove, it’s crucial to start with a clean glove to prevent any damage during the heating process.
Avoid using soap or detergents, as these can harm the leather. Instead, gently wipe the glove’s surface with a damp cloth to remove any dirt or debris.
Allow the glove to air dry completely before proceeding to the oven break-in method.
Here are some tips for cleaning your glove:
- Use a soft, damp cloth for cleaning.
- Avoid submerging the glove in water.
- Do not apply direct heat to speed up drying.
- If necessary, use a fan to circulate air and assist in drying.
Remember, a clean glove ensures a more effective and safe break-in process, maintaining the integrity of the leather and preparing it for optimal performance.
Preheating the Oven to the Right Temperature
Preheating your oven to the correct temperature is crucial for the break-in process of your baseball glove.
Ensure the oven is set to a low temperature, typically around 200-250 degrees Fahrenheit, to avoid damaging the leather.
It’s important to note that ovens can vary, so using an oven thermometer to verify the temperature is a wise precaution.
Follow these steps to preheat your oven safely:
- Clean any debris or residue from the oven racks.
- Set the oven to the desired temperature and allow it to fully preheat.
- Place an oven thermometer inside to check the accuracy of the internal temperature.
Remember, the goal is to soften the glove’s leather, not to cook it. Overheating can cause the leather to harden and become brittle, which is counterproductive to the break-in process.
Safety Precautions Before Using the Oven
Before attempting the oven method for breaking in your baseball glove, it’s crucial to prioritize safety to prevent damage to your glove or risk of fire.
Always consult your glove’s manufacturer guidelines to ensure that the oven method is suitable for your specific glove material and construction.
Follow these safety tips to protect both your glove and your home:
- Never exceed the recommended temperature, which is typically around 200-250 degrees Fahrenheit. Higher temperatures can degrade the leather and stitching.
- Avoid leaving the glove unattended in the oven. Continuous monitoring is essential to prevent overheating.
- Use oven mitts or gloves when handling the hot glove to prevent burns.
- Ensure that the oven is clean and free of any flammable residues that could ignite at high temperatures.
- After the break-in process, allow your glove to cool down naturally in a safe area, away from any heat sources or direct sunlight.
By adhering to these precautions and using common sense, you can safely use the oven to break in your baseball glove, enhancing its flexibility and fit for better performance on the field.
Read Also: How to Break in a Synthetic Baseball Glove
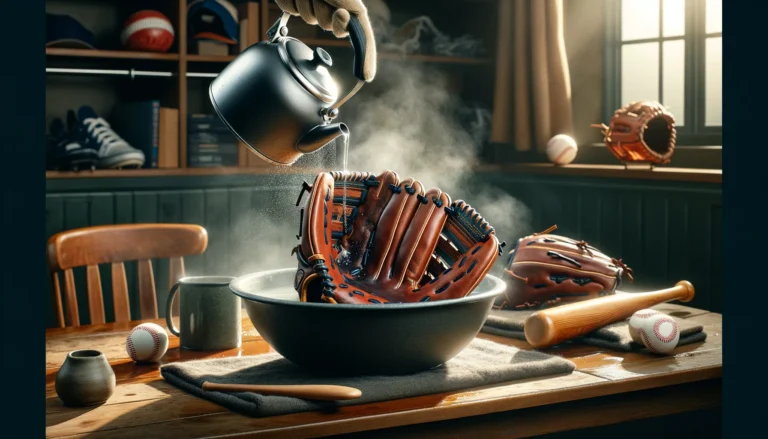
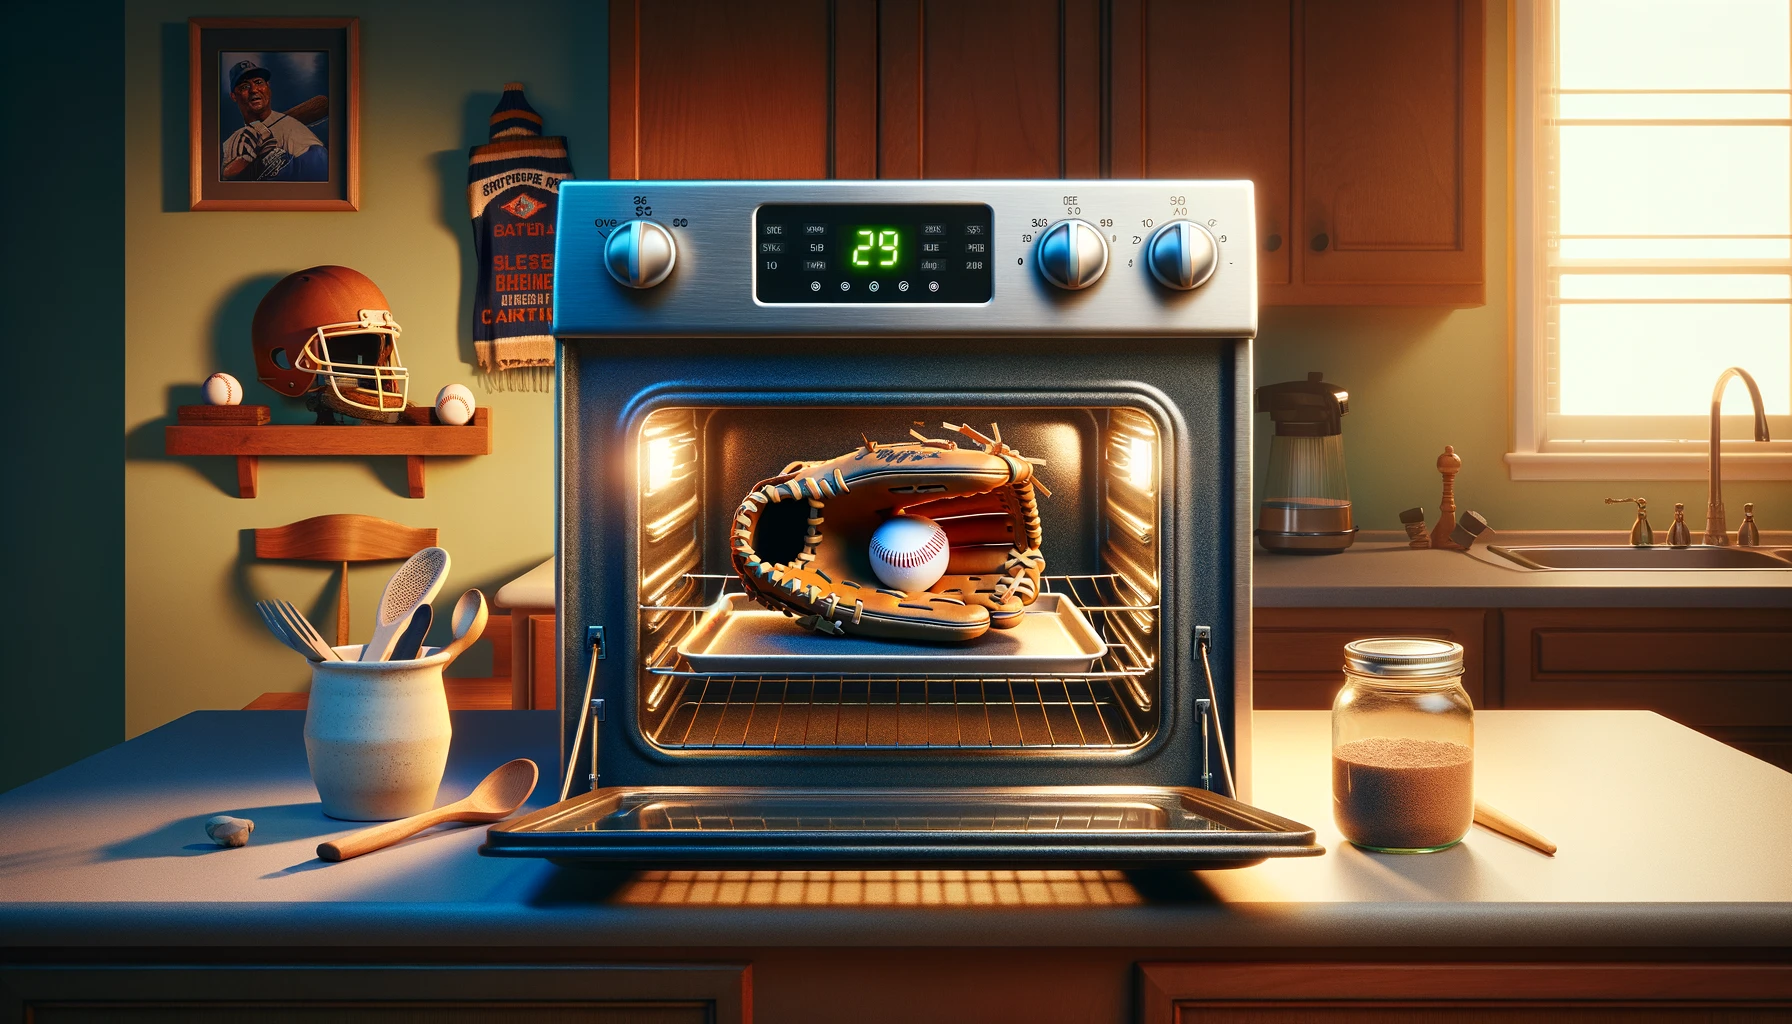
The Oven Break-In Process
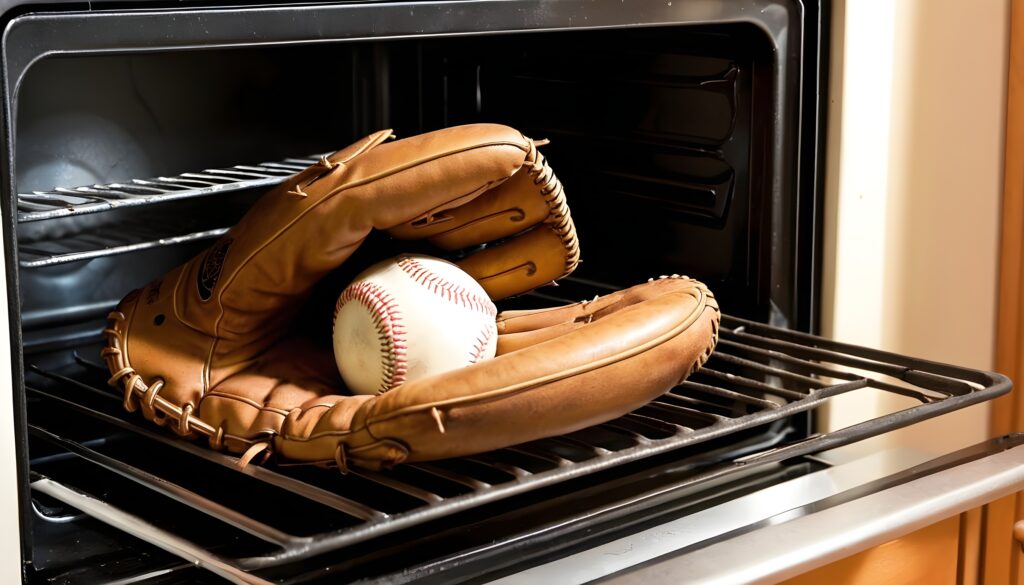
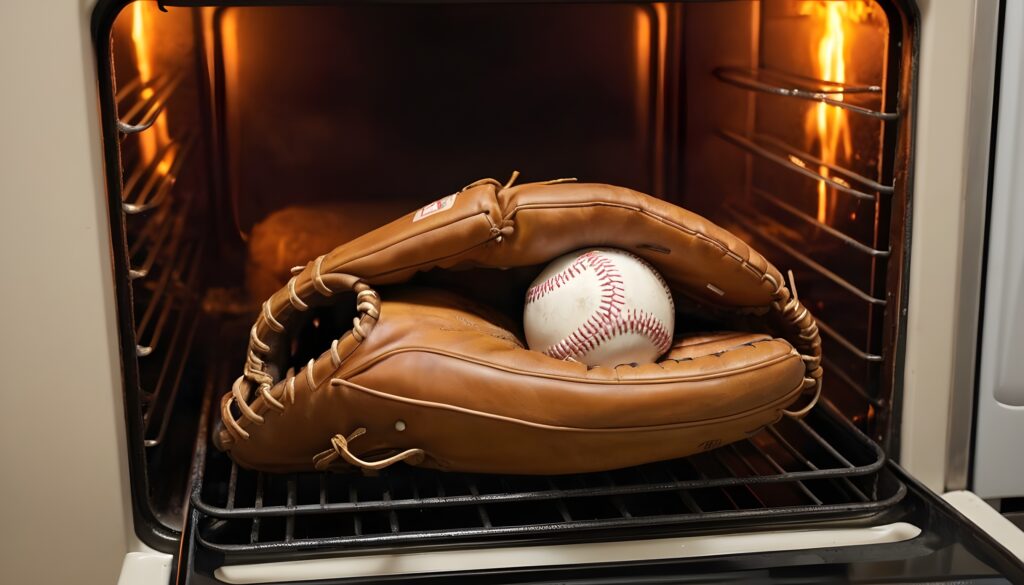
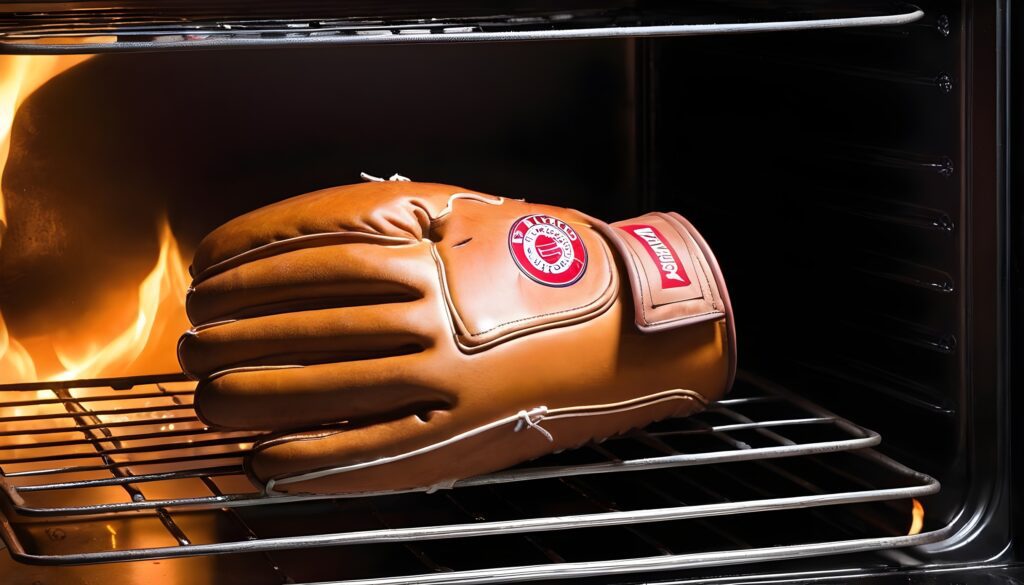
Positioning Your Glove in the Oven
When using the oven to break in your baseball glove, positioning is crucial. Place the glove on the center rack to ensure even heat distribution, avoiding direct contact with heating elements.
It’s important to create a stable base for the glove to maintain its shape during the heating process.
Follow these steps to position your glove correctly:
- Set the oven rack to the middle position.
- Lay a sheet of aluminum foil or an oven-safe tray on the rack.
- Place the glove on its side with the pocket facing up.
- Slightly open the glove to allow heat to circulate inside.
Remember, the goal is to soften the leather without damaging it, so precise positioning and close monitoring are essential to the success of this method.
Monitoring the Break-In Time
Once your glove is positioned correctly in the oven, it’s crucial to monitor the break-in time carefully.
Do not leave the glove unattended as the heat can quickly alter the leather’s properties. A general guideline is to set a timer for 4 minutes, and then check the glove’s flexibility.
If it’s not yet to your liking, heat in additional 1-minute increments, but never exceed a total of 10 minutes to prevent damage.
After each interval, use oven mitts to carefully remove the glove and test its pliability. This process helps ensure that your glove reaches the optimal level of softness without compromising its integrity.
Remember, the goal is to achieve a custom fit that feels like an extension of your hand, not to weaken the leather.
Here’s a simple checklist to follow during the oven break-in process:
- Preheat the oven to the recommended temperature (usually around 200-250 degrees Fahrenheit).
- Place the glove in an “A-Frame” position to maintain its shape.
- Set a timer for the initial 4 minutes.
- Check and flex the glove after each heating interval.
- Stop the process if the glove feels adequately broken in or if you’ve reached the 10-minute mark.
Post-Oven Glove Care
After completing the oven break-in process, it’s crucial to give your baseball glove the care it deserves to maintain its newfound flexibility and shape.
Immediately work the glove’s leather by flexing and bending it at the thumb and pinky areas to prevent it from hardening as it cools down. This also helps to set the pocket according to your hand’s shape.
Next, apply a small amount of specially designed glove oil to keep the leather ‘alive’ and provide a softening condition.
Be sure to distribute the oil evenly, avoiding over-saturation which can weigh down the leather and degrade its quality. A light buff with a cloth can remove any excess and give the glove a nice finish.
Finally, store your glove in a cool, dry place, ideally with a ball in the pocket to help retain its shape.
Avoid leaving it in direct sunlight or damp areas, as this can cause discoloration and stiffness. Regular maintenance, including re-waxing and proper storage, will ensure your glove remains game-ready for seasons to come.
Read Also: How to Break in a Baseball Glove with Hot Water
Alternative Glove Break-In Techniques
Tried-N’-True Drying Techniques
When it comes to drying a wet baseball glove, the key is to dry it up properly without causing damage to the leather. It’s essential to condition the leather and moisturize it to prevent the material from soaking up too much moisture.
Here are some effective drying techniques:
- Use a boot/glove warmer, ensuring there’s a gap for airflow at the elastic cuff.
- Position the glove on its side in front of a standard fan for maximum airflow. Insert a paper towel tube in the wrist cuff to help with this.
- For moisture absorption, consider using products like shoe dehydrators or simply stuffing the glove with newspaper and placing it in a sunny spot.
Remember, while these methods are effective, there are certain things you should avoid:
- Do not wring the glove out like a dish towel.
- Avoid placing the glove too close to a fire, on a radiator, or in a microwave.
By following these guidelines, you can ensure your glove dries without compromising its integrity or performance.
Manual Methods for Breaking in Your Glove
While the oven method is quick, manual techniques can be equally effective and often more rewarding.
Working the break in a glove with your hands is the most traditional approach. This involves bending and flexing the glove to mimic the actions of catching a ball, which helps to soften the leather and shape the pocket.
Here’s a simple guide to manually breaking in your glove:
- Flex the fingers back and forth to start loosening the leather.
- Squeeze the glove closed repeatedly as if grasping a ball.
- Use a mallet or a baseball to pound the pocket area, creating a more defined catch space.
- Play catch regularly, as the glove will form to your hand and the balls you receive.
Remember, the goal is to have the glove conform to your player’s hand side’s unique shape, creating a custom fit that enhances your performance on the field.
Patience is key; manual break-in methods can take several weeks, but the glove will ultimately become an extension of your hand, providing both comfort and improved play.
When to Consider Professional Glove Conditioning
While many players opt for DIY methods to break in their baseball gloves, there are instances where professional glove conditioning might be the better choice.
Professional conditioning is recommended when the glove is particularly stiff or made of high-quality leather that requires special care.
It’s also a good option for players who are unsure of the correct techniques to use or who simply prefer a professional touch to ensure the longevity of their glove.
Here are some signs that it might be time to seek professional glove conditioning:
- The glove remains excessively stiff after attempting other break-in methods.
- You’re dealing with a high-end glove where the risk of DIY methods outweighs the benefits.
- There’s visible damage or wear that might require expert repair alongside conditioning.
Ultimately, the decision to go professional should be based on the value you place on the breaking in a glove and your confidence in personal break-in methods. A well-conditioned glove can make all the difference in performance and comfort on the field.
Read Also: How to Break in a Baseball Glove with Shaving Cream
Maintaining Your Glove Post-Break-In
The Importance of Regular Re-Waxing
Regular re-waxing of your baseball glove is a crucial step in maintaining its longevity and performance.
The frequency of re-waxing depends on how often you use your glove and the conditions it’s exposed to.
For those who use their gloves extensively or in harsh conditions, re-waxing might be necessary every season to ensure optimal weatherproofing and durability.
The re-waxing process is straightforward and can be done at home with ease. Start by cleaning your glove to remove any dirt or debris.
Heat the wax gently, either in a microwave or over a stovetop, taking care not to overheat and damage the leather.
Apply the melted wax liberally using a brush for even distribution, and allow it to penetrate the leather. Finish by buffing the glove with a cloth to remove excess wax, leaving it protected and ready for action.
Remember, a well-maintained glove not only performs better but also adapts to your hand’s shape over time, becoming a true extension of your body on the field.
Regular re-waxing, coupled with proper care, will ensure your glove remains in peak condition for seasons to come.
Proper Storage and Handling of Your Baseball Glove
After breaking your baseball glove, it’s crucial to store and handle it correctly to maintain its condition and prolong its lifespan.
Always store your glove in a cool, dry place to prevent the leather from deteriorating or becoming moldy.
Avoid leaving it in direct sunlight or in damp areas, or hot water, as this can cause the leather to warp or the stitching to weaken.
When handling your glove, be gentle and patient. Do not pull on the seams or stretch the leather unnecessarily.
If you’re not going to use your glove for an extended period, consider placing a ball in the pocket and wrapping it with a rubber band to help retain its shape.
Below is a list of additional tips for proper glove care:
- Use a soft cloth to wipe down your glove after use.
- Condition the leather periodically to keep it supple.
- Avoid excessive heat and moisture.
- Store your glove away from other equipment to prevent misshaping.
By following these guidelines, you can ensure that your glove remains in top condition, ready for the next game or practice session.
Troubleshooting Common Post-Break-In Issues
After breaking in your baseball glove, you might encounter a few common issues that can affect its performance and comfort.
Addressing these problems promptly ensures your glove remains in top condition for the long haul.
Here are some troubleshooting tips:
- Stiffness: Even after a proper break-in, gloves can stiffen over time. Regular conditioning with glove oil can maintain the softness and pliability of the leather.
- Shape Loss: To retain the glove’s shape, store it with a ball in the pocket and wrap it with a belt or glove wrap.
If these tips don’t resolve your issues, don’t hesitate to reach out to customer support at [email protected] for personalized advice.
Remember, a well-maintained glove not only performs better but also lasts longer, making it a worthy investment for any serious player.
Read Also: What Oil to Use to Break in a Baseball Glove
Expert Tips and Testimonials
Advice from Professional Baseball Players
Gleaning insights from those who have spent countless hours on the diamond, we’ve gathered advice from seasoned professionals about breaking in a baseball glove.
Chris Bangert, known as the man behind Ball Glove King, emphasizes the importance of choosing the right glove from the start.
His mission is to guide players and parents through the glove-purchasing process, ensuring they make informed decisions.
Professional players often remind us that while the oven method can be effective, it’s not without its risks.
They advocate for a combination of methods, including manual manipulation and proper maintenance, to extend the life of the glove.
Here’s a list of their top tips:
- Always start with a clean glove to avoid damaging the leather.
- Use the oven method sparingly and monitor the glove closely during the process.
- After oven treatment, work the glove by hand to shape it to your preference.
- Regular maintenance, including re-waxing and proper storage, is crucial for glove longevity.
These tips not only help in breaking in a new glove quickly but also in maintaining its performance over time. Remember, a well-cared-for glove is a player’s best ally on the field.
What Reviewers Are Saying About the Oven Method
The Oven Method for breaking in baseball gloves has garnered attention from both casual players and enthusiasts.
Reviewers often highlight the speed and efficiency of this technique, noting its ability to soften the leather quickly. However, they also emphasize the importance of following the method correctly to avoid damaging the glove.
Feedback from users suggests a few common themes:
- The necessity of monitoring the glove closely while in the oven to prevent overheating.
- The value of post-oven care, including proper re-waxing and storage, is to maintain the glove’s condition.
- A range of experiences with the method, from high satisfaction to cautionary tales of gloves that became too brittle or lost their shape.
While the Oven Method is a popular choice, it’s clear that it requires careful attention to detail.
Reviewers recommend always starting with a lower temperature and shorter time, then adjusting as needed based on the glove’s specific leather and condition.
Maximizing Glove Performance Through Proper Break-In
To ensure your baseball glove reaches its optimal performance level, a proper break-in is crucial.
The break-in process not only shapes the glove to your hand but also enhances its flexibility and responsiveness.
Following the oven method, it’s essential to continue the break-in with regular use and maintenance.
- After the initial oven treatment, work the glove by playing catch or using a mallet to simulate catching balls.
- Apply a conditioner to keep the leather supple and prevent it from drying out.
- Store the glove in a cool, dry place and avoid leaving it in direct sunlight or excessively hot areas.
Remember, the goal is to achieve a glove that feels like an extension of your hand. The ‘Hot Glove Heat Treatment’ is one such product that can assist in this process.
Simply apply the Hot Glove Formula generously around the glove and laces, and the power of the formula is unleashed through the low heat of your oven. This method can significantly reduce break-in time and get you game-ready faster.
Read Also: How to Clean the Inside of a Baseball Glove
Conclusion
Breaking in your baseball glove is key to making it feel just right, almost like it’s part of your hand.
Some folks stick to old-school ways, but using your oven can speed things up big time. Just be careful to do it right so you don’t mess up your glove. At first, it might feel a bit tight, but with a little time, it’ll shape up to your hand perfectly.
Once you’ve got it feeling good, keep it in top shape with some regular love and care, maybe a touch-up with some wax now and then.
Whether you’re hitting the ball or making those big plays in the field, a glove that fits playing style just right can up your game.
Frequently Asked Questions
Can I expedite the break-in process of my baseball glove?
Sure can! The Oven Method is a great way to speed up the break-in process. Check out our instructional video in the ‘Videos’ section for guidance.
How do I re-wax my 4-Season Gloves?
To re-wax your gloves, ensure they are clean and apply melted wax evenly using a brush. After letting the wax soak in for a few minutes, buff the gloves with a cloth to remove excess wax.
Is it normal for my new Give’r gloves to feel snug at first?
Yes, it’s normal. The gloves are designed to be snug initially and will stretch and mold to your hands with use, providing a comfortable, custom fit over time.
What should I do if my baseball glove gets dirty?
If you can’t resist cleaning, use a damp cloth without soap to wipe away dirt. Then, dry the glove slowly in front of a fan, avoiding direct heat sources.
How often should I re-wax my 4-Season Gloves?
Re-waxing frequency depends on use and exposure to elements. Regular re-waxing is important to maintain the leather’s condition and protective qualities.
Are there any precautions I should take before using the Oven Method?
Absolutely. Ensure your glove is clean, preheat the oven to a low temperature, and never leave the glove unattended. Always follow the specific instructions provided for the Oven Method.