How To Clean Baseball Cleats?
Keeping baseball cleats clean not only maintains their appearance but also ensures they perform well on the field. Regular cleaning can extend the life of your cleats and prevent issues like odor and mold.
This step-by-step guide will walk you through the process of effectively cleaning your baseball cleats, from preparing them for cleaning to long-term care and maintenance.
Key Takeaways
- Pre-cleaning steps such as removing loose dirt and pre-treating stains are crucial for an effective cleaning process.
- Hand washing with the right solution and techniques tailored to different materials can protect your cleats from damage.
- Specialized cleaners and household items like baking soda and magic erasers can be used for deep cleaning tough stains.
- Proper air drying and stuffing techniques help maintain the shape of your cleats and prevent material damage.
- Establishing a regular cleaning schedule and proper storage are key to prolonging the life and performance of your baseball cleats.
Preparing Your Baseball Cleats for Cleaning
Removing Loose Dirt and Debris
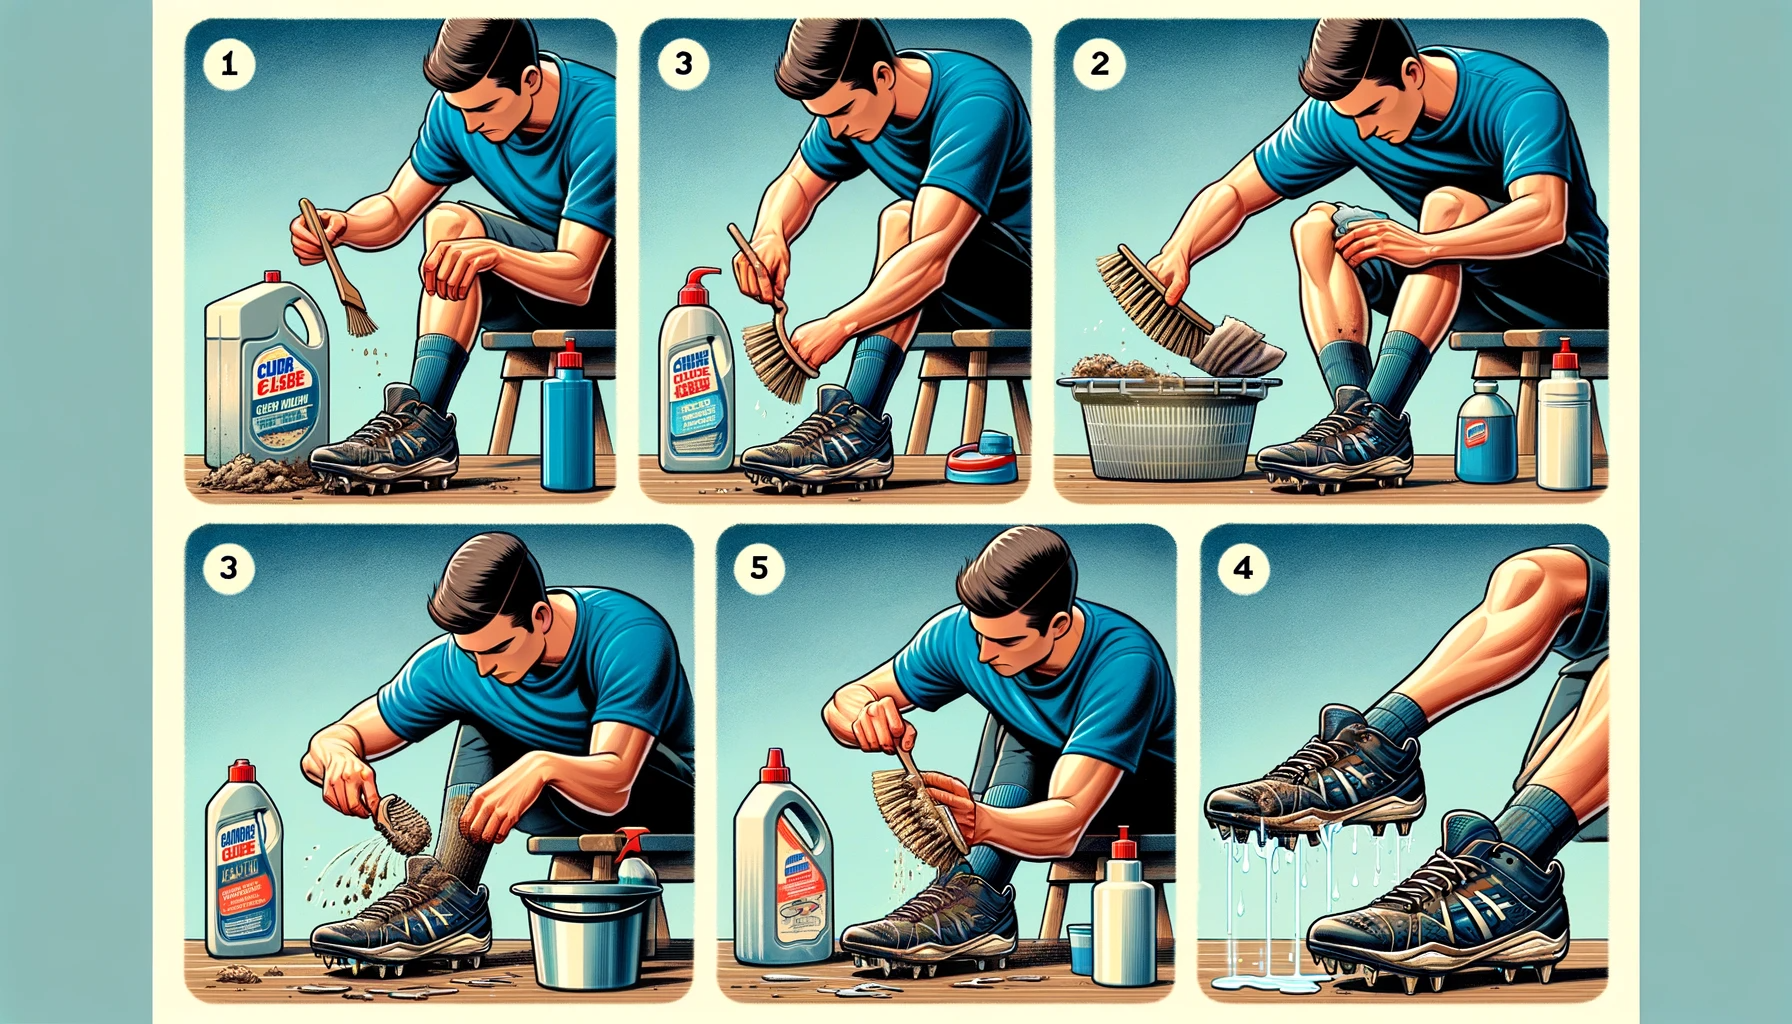
Begin the cleaning process by brushing off any loose dirt, grass and debris from your baseball cleats.
This can be done using a soft-bristled brush or a handheld broom, ensuring you cover all areas, especially the soles where dirt tends to accumulate.
- Tap the cleats together gently to dislodge any remaining particles.
- Use a dry cloth to wipe down the surface, paying close attention to crevices and indentations where dirt may hide.
This initial step is crucial as it prevents scratching or damaging the material during the wet cleaning process and makes the subsequent steps more effective.
Taking Out the Laces for Separate Cleaning
Once you’ve removed loose dirt from your baseball cleats, the next step is to take out the laces. Cleaning the laces separately ensures that both the cleats and laces get thoroughly cleaned.
Here’s how to do it:
- Gently unlace your cleats, making sure not to tug too hard to avoid damaging the eyelets.
- Soak the laces in a mixture of warm water and a small amount of gentle detergent for about 20 minutes.
- After soaking, rub the laces together to address any stubborn dirt, then rinse them thoroughly under running water.
Once the laces are clean, set them aside to air dry completely. This process not only cleans the laces but can also help in removing any lingering odors.
While the laces are drying in washing machine, you can proceed to pre-treat any stains on the cleats before the main wash.
Pre-Treat Stains Before the Main Wash
Before diving into the main wash, it’s crucial to address any stains on your baseball cleats. Pre-treating stains can make a significant difference in the overall cleaning process.
Here’s how to do it effectively:
- Start by consulting the care label for any specific instructions related to stain removal.
- Apply a small amount of a gentle detergent, like Tide Liquid, directly onto the stain.
- Allow the solution to sit on the stain for about 20 minutes to penetrate and break down the dirt.
After pre-treating, proceed to wash the cleats as usual. If the stain persists, consider repeating the process or using a stronger stain remover.
Always test any cleaning solution on a hidden area of the cleats to ensure it doesn’t cause discoloration or damage. Once satisfied, move on to the main wash to complete the cleaning.
Read Also: What Size Baseball Cleats Should I Get
Hand Washing Your Baseball Cleats
Choosing the Right Cleaning Solution
Selecting an appropriate cleaning solution is crucial for the safety and effectiveness of the cleaning process.
Opt for a cleaner that is specifically designed for athletic footwear to ensure it won’t harm the materials of your baseball cleats or spikes.
Here are some points to consider:
- Check if the cleaner is suitable for the specific materials of your cleats, such as leather or synthetic.
- Verify that the solution is non-toxic and non-corrosive to protect both your health and the environment.
- Ensure the cleaner does not leave any residue that could attract more dirt or degrade the material over time.
Using a cleaner that meets these criteria will help maintain the integrity of your cleats and keep them in top condition for longer.
Gentle Scrubbing Techniques for Different Materials
When cleaning baseball cleats, it’s crucial to use the right tools and techniques to avoid damaging the materials.
Start with a soft-bristled brush to gently remove any loose dirt and debris from the surface of the cleats.
This is especially important for materials like leather or synthetic fabrics that can easily scratch.
For the outsoles, a damp cloth is often sufficient to wipe away dirt, mud and grime. If you encounter tougher stains, consider using a mild cleaning solution.
Apply the solution with a soft cloth or sponge, using circular motions to lift the stains without applying excessive force.
Here’s a quick rundown of the process:
- Use a soft-bristled brush for the upper part of the cleats.
- Wipe the outsoles with a damp cloth.
- Apply a mild cleaning solution for persistent stains.
- Gently scrub in circular motions.
By following these steps, you can ensure that your cleats are cleaned effectively without causing harm to the materials.
Rinsing and Removing Soap Residue
After thoroughly scrubbing your baseball cleats, it’s crucial to rinse them properly to remove any soap residue.
If you’ve used a standard detergent, empty the basin of soapy water and gently rinse the cleats.
You can either hold them under running water or refill the basin with fresh water to rinse by lightly agitating the cleats.
This method is especially gentle and prevents potential damage from the force of running water.
For those who have opted for a no-rinse detergent, this step can be skipped, saving you time and reducing the handling of the cleats.
Once rinsing is complete, gently press out excess water from the cleats. Be careful not to twist or wring them, as this can cause the materials to stretch or become misshapen.
Proceed to the next step to ensure your cleats are dried properly and maintain their form.
Read Also: Can You Wear Baseball Cleats for Lacrosse
Deep Cleaning Techniques for Stubborn Stains
Using Specialized Cleaners for Tough Marks
When dealing with particularly stubborn stains on your baseball cleats, turning to specialized cleaners can make a significant difference.
Spray-on stain removers like ‘Grandma’s Secret Sneaker Cleaner’ are designed to tackle tough marks on various materials, including rubber, canvas, and leather.
Simply apply the cleaner directly to the affected area and allow it to sit for at least 15 seconds, giving the formula time to penetrate and lift the stain.
For areas that are difficult to reach or require a more precise application, consider using a cleaning wipe or a Magic Eraser.
These tools are effective for picking up dust, dirt, and scuffs, but may not be suitable for all materials and could miss spots in tight corners.
Always test a small, inconspicuous area first to ensure the cleaner does not adversely affect the material of your cleats.
Lastly, remember that while these specialized cleaners are powerful, they should be used with caution. Harsher chemicals may be more effective, but they can also cause damage if not used properly.
Follow the instructions carefully and use these products as part of a comprehensive shoe cleaning routine to keep your cleats in top condition.
The Baking Soda Method for White Cleats
White cleats can regain their pristine appearance with a simple baking soda method. Mix baking soda with a small amount of water to create a paste.
This paste can be applied directly to the stains on your cleats using soft brush, an old toothbrush or a soft cloth.
Follow these steps for effective cleaning:
- Wet the surface of the cleats lightly with lukewarm water.
- Dip the toothbrush into the baking soda paste and gently scrub the stained areas.
- Once you’ve thoroughly scrubbed the stains, wipe the paste off with a damp microfiber cloth.
- Repeat the process if necessary until the stains are no longer visible.
After cleaning, it’s crucial to let your cleats dry naturally. Avoid exposing them to direct heat or sunlight, as this can further absorb moisture and cause damage to the material.
When to Use a Magic Eraser on Your Cleats
Magic Erasers can be a game-changer for cleaning baseball cleats, especially when dealing with tough scuff marks and ground-in dirt.
Wet the Magic Eraser and gently squeeze out any excess water before use.
Here’s how to effectively use it:
- Scrub gently on the affected areas, focusing on scuffs and dirt that didn’t come off during the initial cleaning.
- Be cautious around delicate materials to avoid damage.
- After scrubbing, let the cleats dry thoroughly. Stuff them with paper to help maintain their shape and ensure they air dry away from direct sunlight.
Avoid using Magic Erasers on areas that are hard to reach or on materials that are too delicate, as they can be abrasive. For best results, use the eraser on smooth surfaces where scuffs are most visible.
Read Also: Can You Wear Metal Cleats in High School Baseball
Drying and Maintaining the Shape of Your Cleats
Proper Techniques for Air Drying
After cleaning your baseball cleats, air drying is the safest method to prevent damage and maintain their shape.
Lay the cleats on a flat, ventilated surface away from direct sunlight, which can cause the colors to fade and the material to deteriorate.
A flat mesh drying rack is ideal as it allows air to circulate freely around the cleats, speeding up the drying process without compromising the cleats’ structure.
Avoid placing the cleats on wood furniture or floors, or over metal radiators, as this can lead to staining and damage to both the cleats and the surfaces.
Instead, opt for a non-staining surface like a towel or a dedicated drying rack.
If you have synthetic cleats, you may wipe them off with a cloth before air drying to ensure no soap residue remains. This step is crucial for maintaining the cleats in top condition for your next game.
Stuffing Cleats to Preserve Shape During Drying
After a thorough cleaning, preserving the shape of your baseball cleats is crucial during the drying and cleaning process begins.
Stuffing your cleats with paper or a towel can help maintain their form. This method not only helps the cleats keep their original shape but also absorbs excess moisture, speeding up the drying time.
Follow these steps to ensure proper stuffing:
- Begin by choosing an absorbent material, such as newspaper or a clean, dry towel.
- Gently stuff the material into the cleats, making sure to fill out the toes and sides to mimic the shape of your feet.
- Avoid overstuffing, as this can stretch the material and alter the fit of the cleats.
- As the cleats dry, check the stuffing periodically and replace it if it becomes damp.
By taking the time to stuff your cleats correctly, you can ensure they are ready for your next game in perfect condition.
For added convenience, consider using a Klitch Footwear Clip to hang your cleats outside of your bag, keeping them fresh and your bag clean.
Avoiding Heat Sources to Prevent Damage
Exposing baseball shoes and cleats to direct heat sources can compromise their integrity and shorten their lifespan.
Always allow cleats to air dry naturally to maintain their shape and material quality.
Follow these simple guidelines to avoid heat damage:
- Place cleats in a well-ventilated area away from direct sunlight and heat sources such as radiators, heaters, or the dryer.
- If you’re in a hurry, resist the temptation to speed up the drying process with a hairdryer or by placing them near an oven.
- For a gentle scent and to aid in the drying process, consider using natural alternatives like wool laundry balls with a few drops of essential oil.
By adhering to these practices, you ensure that your cleats remain in top condition, ready for your next game.
Conclusion
Maintaining the cleanliness of your baseball and soccer cleats, not only extends their lifespan but also ensures optimal performance on the field.
By following the step-by-step guide outlined in this article, you can effectively clean your cleats using household items and simple techniques.
Remember to remove excess dirt before washing, use the right cleaning solutions, and allow your cleats to dry thoroughly.
Regular care will keep your cleats in top condition, ready for your next game.
Happy cleaning, and here’s to another baseball season and many more successful innings!
Frequently Asked Questions
What is the first step in preparing baseball cleats for cleaning?
The first step is to remove loose dirt and debris from the cleats. This can be done by knocking the cleats together and using a soft-bristled brush to brush away the remaining dirt..
How should I handle the laces when cleaning baseball cleats?
You should remove the laces and clean them separately. Soak them in warm water with a bit of dish soap, then rinse and let them air dry.
What solution is recommended for hand washing baseball cleats?
Use a mild cleaning solution suitable for the material of your cleats. Avoid harsh chemicals that could damage the material.
Can I use a Magic Eraser on my baseball cleats?
A Magic Eraser can be used on certain parts of the cleats, such as scuff marks and tough stains, but be cautious with colored and delicate materials as it can be abrasive.
What’s the best way to dry baseball cleats after cleaning?
Stuff the cleats with paper or a towel to maintain their shape and let them air dry away from direct heat sources to prevent damage.
How often should I clean my baseball cleats?
Regular cleaning after each use is ideal to maintain the cleats, but a thorough wash can be done as needed or when they are significantly soiled.

